(Originally posted to LinkedIn.com by OdeCloud’s Ahad Arain)
(Updated Oct. 18, 2021)
For many day to day users, the world of NetSuite can be a difficult one to navigate. With two product releases each year, and a ton of new features being pushed, performing customizations can seem like a task strictly for experienced professionals or consultants.
Our goal at OdeCloud is to enable end-users (like yourself) to be able to perform such tasks with ease and efficiency. The above is a request I’ve come across many times throughout the years. I will summarize how you can perform this successfully, while also applying the same technique to multiple records in NetSuite, saving time and increasing efficiency in the long run.
First, let’s start by discussing the difference between a subtab and sublist in NetSuite. A subtab would be the various tabs you see throughout the system on records, regardless of the record type. For example, a Sales Order generally has the following subtabs: items, shipping, billing, accounting etc.
Each subtab may have a separate set of sublists within them. In the image below, Related Records is the selected subtab and Support Cases is an associated sublist.
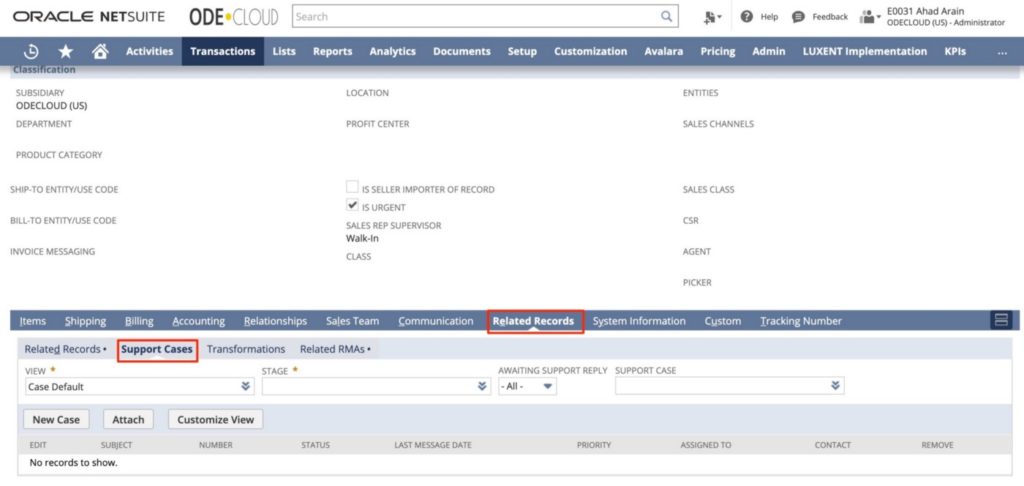
It’s important to note that sublist data is mainly driven by saved searches. This means you can customize a set of existing subtabs to have multiple custom sublists, so long as the details you need are available in an existing saved search.
As the saved search criteria or columns are updated, so will the columns shown on sublist results. This characteristic is what makes these a very powerful tool that can be utilized with little effort to help make it easier to find key related information, without having to open multiple windows.
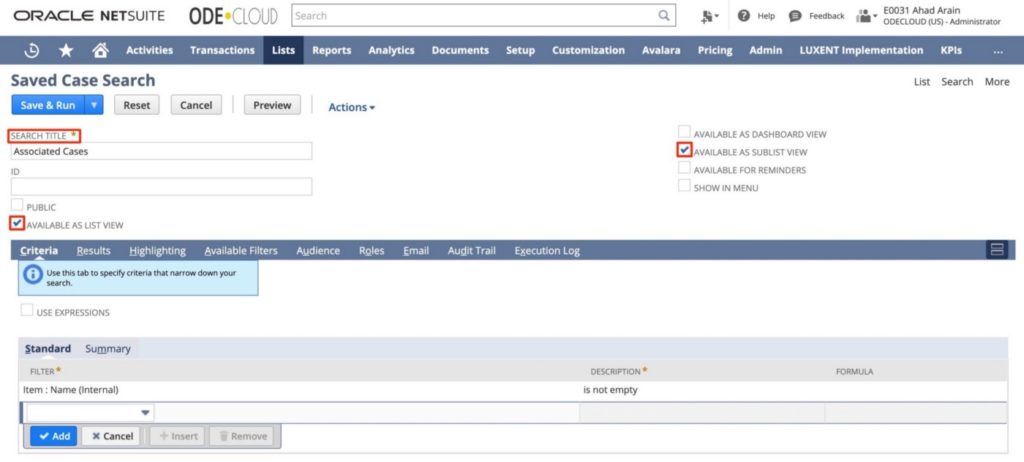
In order to create a list of items with associated cases, you will need to create or find a saved search that has the desired information.
- Ensure Available as List View = True (checked)
- Ensure Available as Sublist View = True (checked)
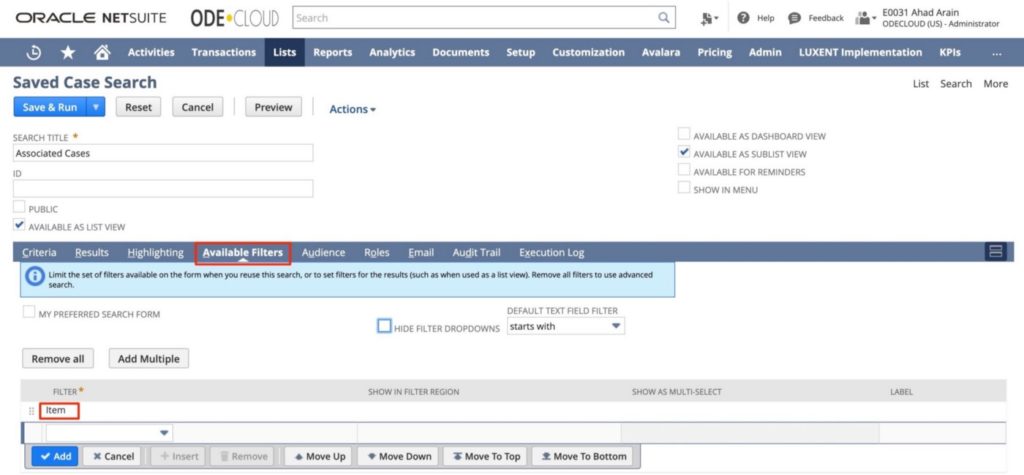
- Under Available Filters, please ensure that Item is added to the list as shown below. This is added because we only want to source cases for the particular item selected, not all items.
Believe it or not, the toughest part is now complete. Next, we will assign this sublist to the item record. Note: you may need higher level permissions or need to contact an Administrator to access the customization capabilities.
- Navigate to Customizations > Forms > Sublists: This is where you will be able to assign the saved search as a custom sublist to various record types.
- Select the saved search you had just created and assign it to the item record. You will need to enter a label and select which tab, I chose to display this on the communication tab within the item record.
- You will also want to specify each individual item type you would like this displayed on. You may click them one at a time in every column to apply to all item types (pro tip: press tab/shift+tab to move across columns and spacebar to check/uncheck the boxes on your keyboard). Once complete, click Save.

Now when you go to the item record and communications tab, you will see the “Related Cases” sublist we have just created. Feel free to create some custom cases to test the results and ensure they are working as you desire. If you need to make tweaks, no further customization needed. All you need to do is edit the saved search criteria, or change the results columns to modify the details in the sublist.
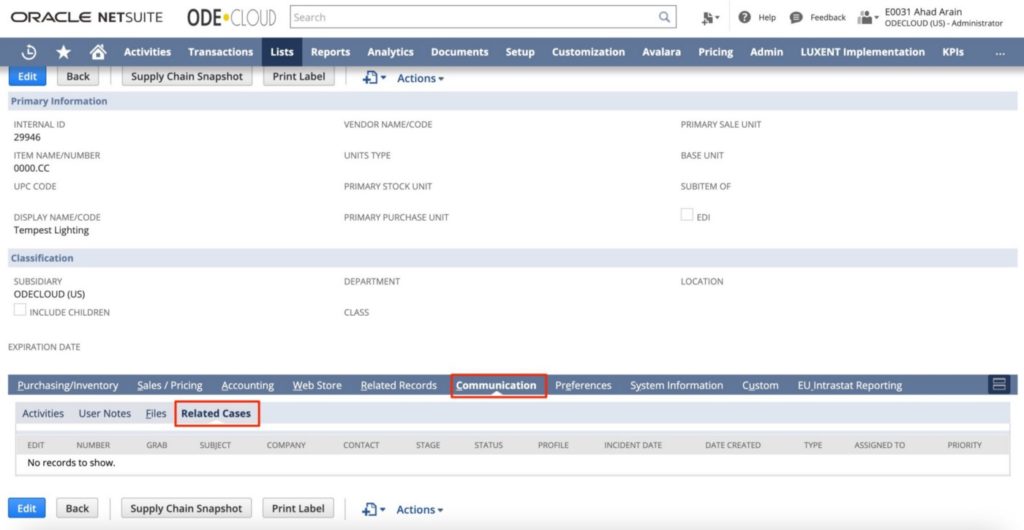
This technique can also be applied to transactions and entity records with the exact same process above.
If you have any NetSuite related concerns, feel free to connect with me on LinkedIn or submit a request to one of our talented team members at www.odecloud.com via Live Chat.
You can also book time with me directly: https://odecloud.com/meet-odecloud-plt


